分类目录归档:科技

macOS 管理多个SSH公钥密钥

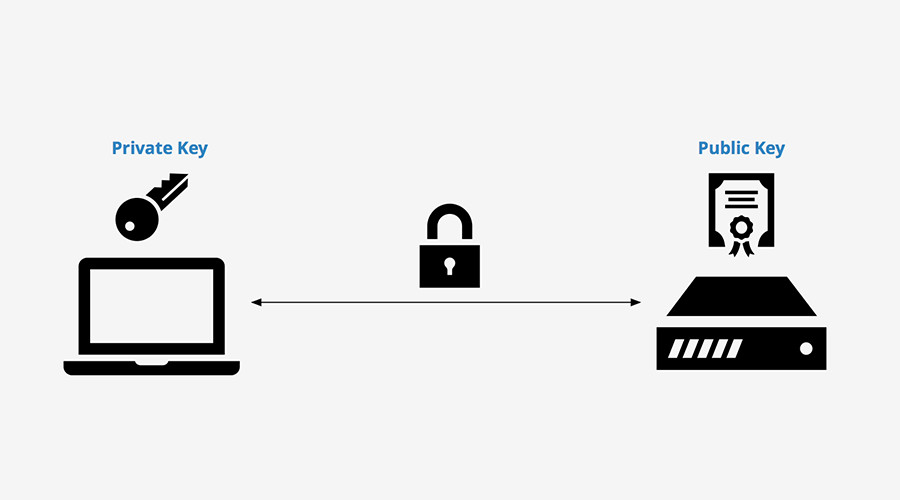
ssh-key

最终结果文件

.
├── authorized_keys
├── config
├── id_rsa.coding
├── id_rsa.coding.company
├── id_rsa.coding.company.pub
├── id_rsa.coding.pub
├── id_rsa.github
├── id_rsa.github.pub
└── known_hosts

新建不同的密钥和Host去匹配(@wazi)。

1、输入邮箱

ssh-keygen -t rsa -b 4096 -C "ytshang@gaoxiaobang.com"

2、保存位置,一般就在默认的目录下即可

Enter file in which to save the key (/Users/key/.ssh/id_rsa):
/Users/key/.ssh/id_rsa.coding.company

3、输入密码两次确认输入,当然密码是不可见的,直接输入完,回车确认即可:

Enter passphrase (empty for no passphrase):[输入密码]
Enter same passphrase again:[再次输入密码]

4、复制公钥:

pbcopy < ~/.ssh/id_rsa.coding.company.pub

把你需要单独的网站SSH公钥密钥,都用以上步骤都生成下。

这是我最终生成的文件(Coding公司、Coding个人、Github个人):
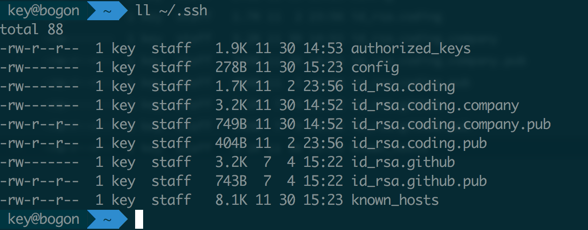
ssh-key

添加到authorized_keys文件里面:

ssh-rsa AAAAB3NzaC1yc2EAAAADAQCAQCw******RQw== keystion@A.com
ssh-rsa AAAAB3NzaC1yc2EAAAADAQAB*******inUtQ== keystion@B.com
ssh-rsa AAAAB3Nz********ZCcvI1xZhBRWpZZdhv4Q== keystion@C.com

config文件

Host github.com
    HostName github.com
    IdentityFile ~/.ssh/id_rsa.github
    User git
Host git.coding.net
    HostName git.coding.net
    IdentityFile ~/.ssh/id_rsa.coding
    User git

Host company.git.coding.net
    HostName git.coding.net
    IdentityFile ~/.ssh/id_rsa.coding.company
    User git

测试是否连接成功

ssh -T git@github.com
Hi Keystion! You've successfully authenticated, but GitHub does not provide shell access.

ssh -T git@git.coding.net
Enter passphrase for key '/Users/key/.ssh/id_rsa.coding':
Hello keystion! You've connected to Coding.net via SSH successfully!

ssh -T git@company.git.coding.net
Hello key_kaikeba! You've connected to Coding.net via SSH successfully!

clone仓库时候多少有一点变化,pullpush等无变化。

git clone git@[Hose]:[UserName]/****.git
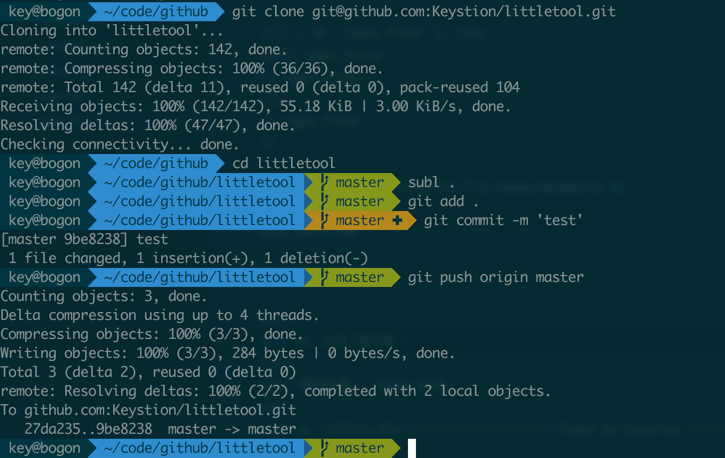
ssh-key

嗯,正文到这里结束。


一个漂亮的无纺布手提袋,不单单只是一个商品的包装袋。

还能够印上贵公司的标志或者广告语,消费者在购物的同时既得到了一个精美的手提袋,而商家也得到了无形的广告宣传两全其美。

适合任何公司、任何行业作为广告宣传、赠品以及外包装之用。

海创以专业的设计和制作工艺,为您做出优质的手提袋,欢迎订购!

联系一下子呗:15003209070

无纺布手提袋


【转】折腾了一下Terminal(终端)之iTerm2

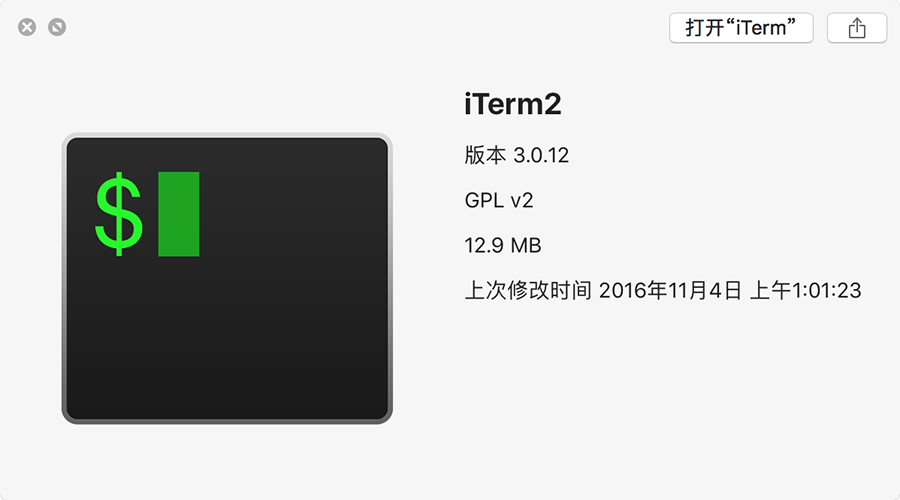
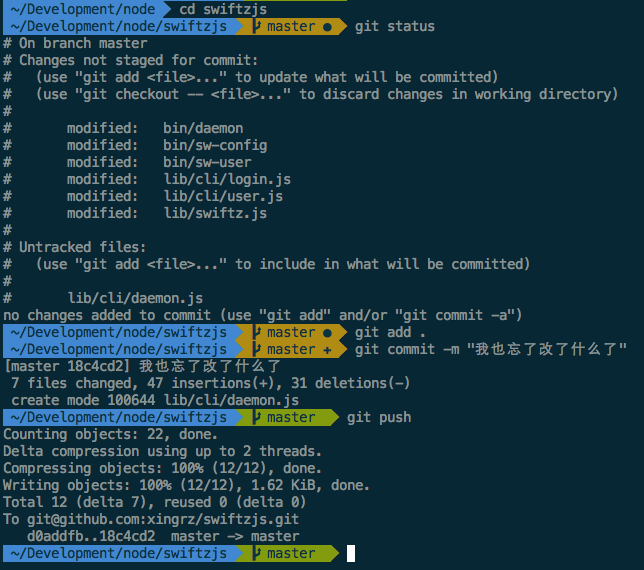
iTerm2.png

很早之前@GhostBoyZone发给我一个关于iTerm 2的主题配置,收藏了,后来也分享给小伙伴们了,特此来Mark到自己的博客里面,顺便修复了字体的问题。

或许别人会觉得这个主题过于花哨,萝卜白菜各有所爱。还有很多大神直接用vim(应该算个神器吧?)。

iterm2-zsh-agnoster-git.png

所以正文从这里开始咯…


终端应用:iTerm2

下载安装,这个你懂的。

Command + , 打开偏好设定窗口:

  1. Profiles / Window,把 Settings for New Windows 中的 Style 改成 Left of Screen 让它在屏幕左侧显示(在宽屏显示器上效果不错)
  2. Keys,勾选 Hotkey 中的 Show/hide iTerm2 with a system-wide hotkey,然后设定一个热键。我个人偏爱 Command + .
    现在按 Command + . 就可以随时调出或者隐藏 iTerm2 了。

<!– more –>

配色方案:Solarized Dark

下载,解压,打开 iTerm2 的偏好设定,Profiles / Colors,最下面的 Load Presets … / Import… 加载 iterm2-colors-solarized/Solarized Dark.itermcolors 配色方案。

Z-Shell

系统自带了 4.0 版的 zsh,但我们可以用 brew install 安装最新的 5.X。

brew install zsh
sudo rm /bin/zsh    # 替换系统自带 zsh
sudo ln -s `brew --prefix zsh`/bin/zsh /bin/zsh
chsh -s /bin/zsh  # 切换系统当前用户的默认 shell 为 zsh

安装完毕,Command + W 关闭 iTerm2 当前窗口,然后按 Command + . 重新打开,此时 shell 已经换成 zsh 了。

oh-my-zsh

这是一套十分强大的 zsh 配置方案。

curl -L https://github.com/robbyrussell/oh-my-zsh/raw/master/tools/install.sh | sh

<del>下载这个字体补丁并安装,给系统中的 Menlo 字体进行增补。</del>

安装字体Monaco for Powerline。(@GhostBoyZone)

链接: https://pan.baidu.com/s/1bp7SfeR 密码: tbbk

打开 iTerm2 的偏好设定,Profiles / Text,把 Regular Font 和 Non-ASCII Font 都换成 Menlo,大小为 14pt Regular。

编辑 ~/.zshrc 文件:

ZSH_THEME="agnoster"          # 使用 agnoster 主题,很好很强大

DEFAULT_USER="你的用户名"     # 增加这一项,可以隐藏掉路径前面那串用户名

plugins=(git brew node npm)   # 自己按需把要用的 plugin 写上

其中插件可以看这里https://github.com/robbyrussell/oh-my-zsh/wiki/Plugins

另外,建议把末尾的 export PATH 稍微调整一下,比如 Homebrew 就建议 /usr/local/bin 应该优先于 /usr/bin;另外也可以自己加上比如 Ruby Gems 目录 /usr/local/opt/ruby/binNode.js NPM 目录 ~/bin 等。

export PATH=/usr/local/bin:/usr/local/sbin/:$HOME/bin:$PATH

关于 Homebrew 的路径,比如 zsh 这个包可以通过 brew --prefix zsh 知道它的目录是 /usr/local/opt/zsh,关于这些链接:

  • /usr/local/opt/zsh 目录 -> /usr/local/Cellar/zsh/版本号 目录
  • /usr/local/bin/zsh 文件 -> /usr/local/Cellar/zsh/版本号/bin/zsh 文件

所以就有了上面那条 chsh -s 命令的写法。

重新打开 iTerm2 窗口,配置完成。玩的愉快 😜


参考资料

转自:http://xingrz.me/2013/2013-06-19/terminal-zhuangbility.html

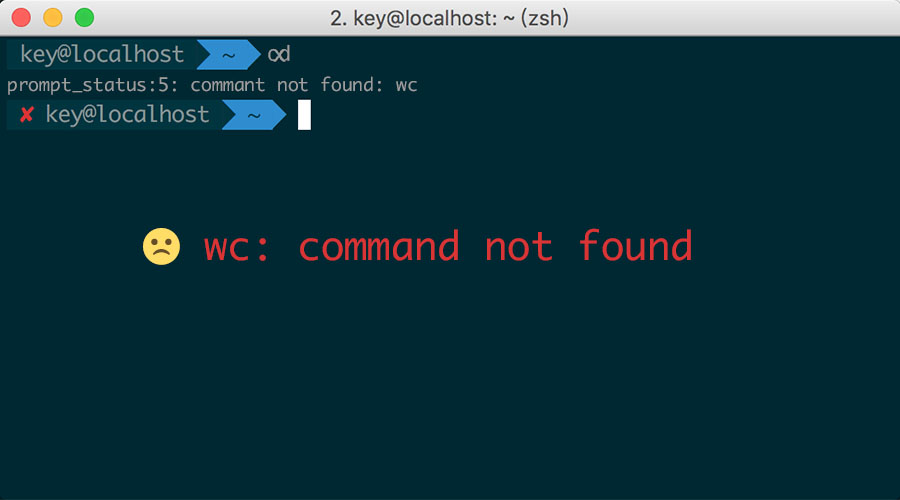
wc: command not found

wc: command not found

环境:macOS Sierra 10.12.1 (16B2555)

今天^2016.11.17在用户目录下面,编辑.bash_profile的时候把PATH的值写错了,结果就出现了小白心惶惶的现象;

wc: command not found 01.jpg

wc: command not found 02.jpg

出现这样的现象,sudocdvi等之类的命令都不能用,迷之尴尬啊,心慌了,怎么才能把.bash_profile里的PATH值修改了呢,就想到了Sublime Text编辑器可以显示隐藏文件,遂把整个用户目录丢到了编辑器里面,找到相应的值,加以修正,这才安心下来。😂

解决方法:

把用户目录丢到sublime text3里面修改了正确的PATH值。

点滴记录,fix it。

Coder 2 Leader

coder2leader

公司内部TechDay分享,有@Terry主讲,学习了很多,特此Mark一下。

困惑一:Code vs People

机器/人

  • Code:可控
  • People:多变
    <!– more –>
    从code和人的角度去阐述了coder转变到leader的过程,了解团队中的每一个人,学习他们的经验。即使没有做过管理也无妨,尝试去管理一件件小事情开始。

困惑二:0/1 vs X

灰色

  • 0/1(二进制):正确/错误
  • X(未知数):没有固定值,管理没有正确、错误,有足够产出的团队就是好团队

对于初学者而言需要“暴力”②,成则成,败则败。

Leader和手下员工比例在:1 vs 7的情况下是有时间去贴身管理每一个人的,超出这个范围将无法贴身去管理一些细节问题。

困惑三:权利双刃剑

时间/效率

管理是双向的,向上的管理,角色转换Coder care Leader需要什么?Leader care 产出。

空降Leader如何去管理?

前因后果了解之后再去使用权力,后来者天生具备弱势,相信认可别人,用实例(力)去证明,黔驴技穷之时可使用权力。

困惑四:沟通力量

意大利人/赞比亚人(小故事)①

  • 简介:意呆利人去援助赞比亚,教当地人种地,当地人表示毫无兴趣。于是意呆利人就自己在河谷边种了番茄,长势喜人。成熟的那一晚,从赞比西河里跳出200多头河马,把西红柿吃个精光。第二天,意呆利人完全惊呆了,赞比亚人过来拍了拍肩膀安慰说:没错,这就是我们不在这里耕种的原因。

困惑五:公开演讲

TED Talks


注:

  1. 木头的体积
  2. 暴力:条件允许的情况下贴身管理,工期紧任务重;
  3. 网易公开课上有段关于这个的演讲《想要帮助别人?闭嘴,听人家说!》

watch&figlet

安装 watch

sudo brew install watch

iTerm or Terminal(终端)

示例代码

watch -t -n1 "date"

2016    3 29        20  33 54   CST

watch && figlet

watch -t -n1 "date +%T|figlet -f banner"

 #####    ###    #   #####  #        #  #        #####
#     #  #   #  ### #     # #    #  ### #    #  #     #
      # #     #  #        # #    #   #  #    #  #     #
 #####  #     #      #####  #    #      #    #   ######
#       #     #  #        # #######  #  #######       #
#        #   #  ### #     #      #  ###      #  #     #
#######   ###    #   #####       #   #       #   #####

<!– more –>

figlet

安装 figlet

$ sudo brew install figlet

iTerm or Terminal(终端)

示例代码

$ figlet "webclown"

              _          _
__      _____| |__   ___| | _____      ___ __
\ \ /\ / / _ \ '_ \ / __| |/ _ \ \ /\ / / '_ \
 \ V  V /  __/ |_) | (__| | (_) \ V  V /| | | |
  \_/\_/ \___|_.__/ \___|_|\___/ \_/\_/ |_| |_|

设置字体

$ figlet -f tinker-toy "W e b c l o w n"

o       o             o                 o
|       |             |                 |
o   o   o     o-o     O-o       o-o     |     o-o     o   o   o    o-o
 \ / \ /      |-'     |  |     |        |     | |      \ / \ /     |  |
  o   o       o-o     o-o       o-o     o     o-o       o   o      o  o

<!– more –>

Wiki

  • http://www.figlet.org/

通过wget下载网站

通过wget下载一个网站

工具

iTerm or Terminal(终端)

示例代码

wget -r -p -np -k --restrict-file-names=nocontrol [url]

如何在电脑上安装wget

<!– more –>

简单的 shell 脚本

wget.sh

put it in /Users/$user

chmod -x wget.sh // Writable

./wget [url] // Any directory

Wiki

  • https://en.wikipedia.org/wiki/Wget
  • https://wiki.ubuntuusers.de/wget/

Git-常用命令

develop via a single branch

t branch -m {{branch}}
git fetch origin
git rebase origin/master -i
git push origin {{branch}}

create a new branch

git checkout -b {{branch}}

checkout remote branch

git checkout -b {{branch}} origin/{{branch}}

<!– more –>

merge branch to master

git checkout master
git merge {{branch}}

delete branch

git branch -D {{localBranch}}
git push --delete origin {{remoteBranch}}

rename repo

git remote -v
// View existing remotes
// origin  https://github.com/user/repo.git (fetch)
// origin  https://github.com/user/repo.git (push)

git remote set-url origin https://github.com/user/repo2.git
// Change the 'origin' remote's URL

add tag

git tag {{tag}}
git push --tags

add tag for a history commit

// Set the HEAD to the old commit that we want to tag
git checkout {{leading 7 chars of commit}}

// temporarily set the date to the date of the HEAD commit, and add the tag
GIT_COMMITTER_DATE="$(git show --format=%aD | head -1)" git tag -a {{tag}} -m "{{commit message}}"

// set HEAD back to whatever you want it to be
git checkout master

git push --tags

delete tag

git tag --delete {{tag}}
git push --delete origin {{tag}}

gh-pages

http://{{group}}.github.io/{{repo}}/

npm add owner

npm owner add {{name}}

一些链接

转自:https://github.com/fool2fish/issues/9

Webclown.net 网站版本快照记录

https://archive.webclown.net/

从开始,到现在

Since: 2014-8-11

Webclown.net 网站版本快照记录

感谢 Wayback Machine 提供的服务。

致逝去的青春,致逝去的时光。

程序员就是这样,喜欢记录(折腾)一切。🤪

v1

https://archive.webclown.net/v1

Webclown.net 网站快照 2014-10-01

v2

https://archive.webclown.net/v2

背景使用「必应」每日一图

Webclown.net 网站快照 2016-01-13

v3

https://archive.webclown.net/v3

Webclown.net 网站快照 2016-11-05

v4

https://archive.webclown.net/v4

Webclown.net 网站快照 2017-10-16

v5

https://archive.webclown.net/v5

Webclown.net 网站快照 2018-04-11

v6

https://archive.webclown.net/v6

Webclown.net 网站快照 2019-07-10

v7

https://archive.webclown.net/v7

Webclown.net 网站快照 2020-05-16

v8

https://archive.webclown.net/v8

Webclown.net 网站快照 2022-01-10

v9

https://archive.webclown.net/v9

Webclown.net 网站快照 2023-05-21

v10

https://archive.webclown.net/v10

Webclown.net 网站快照 2023-09-25

v11 当前版本

webclown.net