大概是三个业务联合使用:对象存储 -> SSL证书服务 -> 融合CDN
七牛云SSL证书服务之搭配对象储存(待更新)
发表评论
大概是三个业务联合使用:对象存储 -> SSL证书服务 -> 融合CDN
刚刚部署了一下,还不错的项目
安装 Node.js,官方安装方法
# On RHEL, CentOS or Fedora, for Node.js v8 LTS:
curl --silent --location https://rpm.nodesource.com/setup_8.x | sudo bash -
# Alternatively for Node.js 9:
curl --silent --location https://rpm.nodesource.com/setup_9.x | sudo bash -
# 安装 Node.js
sudo yum -y install nodejs
# Enterprise Linux(RHEL和CentOS)用户可以使用EPEL存储库中的Node.js和npm包。
# 为您的版本安装相应的epel-release RPM(在EPEL存储库主页上找到),然后运行:
sudo yum install nodejs npm --enablerepo=epel
安装构建工具,要从npm编译和安装本地插件,您可能还需要安装构建工具:
sudo yum install gcc-c++ make
# or: sudo yum groupinstall 'Development Tools'
安装 MongoDB,首先创建源,创建 mongodb.repo 文件
# 在/etc/yum.repos.d/目录下创建文件mongodb.repo,它包含MongoDB仓库的配置信息,内容如下:
# 复制代码, 代码如下:
[mongodb]
name=MongoDB Repository
baseurl=http://downloads-distro.mongodb.org/repo/redhat/os/x86_64/
gpgcheck=0
enabled=1
yum 安装 MongoDB
sudo yum install mongodb-org
为 YApi 初始数据库
use yapi // 创建yapi数据库
db.wong.insert({"name":"kenny wong"}) // 插入一条数据,将在数据库列表中展示
show dbs // 查看所有数据库
db.addUser('yapi','yapi321') // 老的,数据库加用户的命令

db.createUser(
  {
    user: "yapi",
    pwd: "yapi321",
    roles:
    [
      {
        role: "userAdminAnyDatabase",
        db: "yapi"
      }
    ]
  }
)
<!– more –>
mkdir yapi && cd yapi
git clone https://github.com/YMFE/yapi.git vendors --depth=1 # 或者下载 zip 包解压到 vendors 目录
cp vendors/config_example.json ./config.json # 复制完成后请修改相关配置
vi ./config.json
配置如下,主要配置 MongoDB 数据库,以及 Admin 账号。
{
  "port": "3011",
  "adminAccount": "admin@admin.com",
  "db": {
    "servername": "127.0.0.1",
    "DATABASE":  "yapi",
    "port": 27017,
    "user": "yapi",
    "pass": "yapi123"
  },
  "mail": {
    "enable": true,
    "host": "smtp.163.com",
    "port": 465,
    "from": "***@163.com",
    "auth": {
        "user": "***@163.com",
        "pass": "*****"
    }
  }
}
cd vendors
npm install --production --registry https://registry.npm.taobao.org # 安装依赖
npm run install-server  # 安装程序会初始化数据库索引和管理员账号,管理员账号名可在 config.json 配置
# 默认输出
# 初始化管理员账号成功,账号名:"admin@admin.com",密码:"ymfe.org"
# 后台启动,输出日志yapi.log
node server/app.js >> yapi.log 2>&1 &
# 启动服务器后,请访问 127.0.0.1:{config.json配置的端口},初次运行会有个编译的过程,请耐心等候
# 127.0.0.1:3011
目录结构
|-- config.json
|-- init.lock
|-- log
|   `-- 2018-1.log
`-- vendors
    |-- CHANGELOG.md
    |-- LICENSE
    |-- README.md
    |-- client
    |-- common
    |-- config_example.json
    |-- doc
    |-- exts
    |-- nodemon.json
    |-- npm-debug.log
    |-- package.json
    |-- plugin.json
    |-- server
    |-- static
    |-- test
    |-- webpack.alias.js
    |-- yapi-base-flow.jpg
    |-- ydocfile.js
    `-- ykit.config.js
Originally posted by @jaywcjlove in https://github.com/YMFE/yapi/issues/103#issuecomment-359669968
一个不错的提效工具,它可以简化你在终端敲 cd 的次数,比如你经常敲想以下这种命令,
cd ~/workshop
cd ~/workshop/app-one/
cd ../app-two/
cd ~/workshop/app-three/
...
cd ~/workshop/app-ten/
安装它之后,可以简化以上过程:
j workshop
j one
j two
j three
...
j app-ten
<!– more –>
更多使用方式查看:https://github.com/wting/autojump
MacBook Pro 从 macOS Sierra 升级到 macOS Catalina(beta)之后,Alfred 出现了两个APP的搜索结果:System/Volumes/Data/Applications/wechat.app 和 Applications/wechat.app
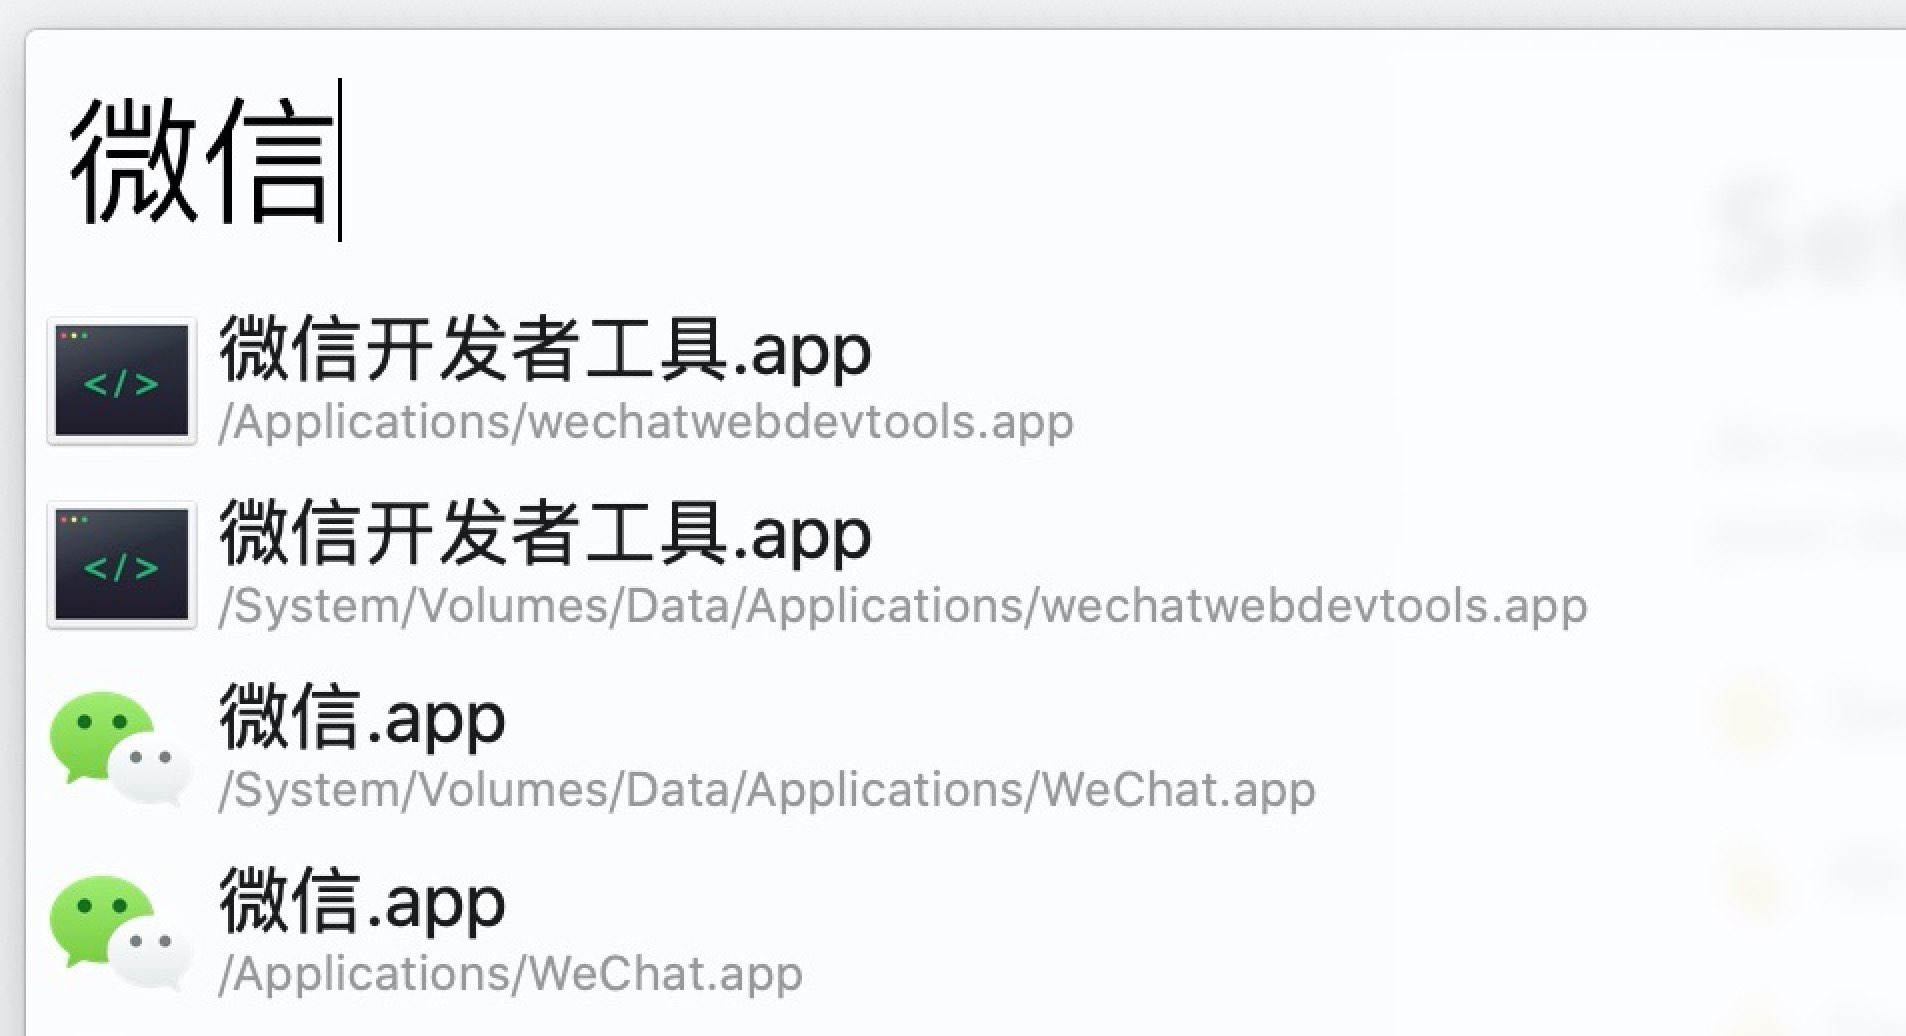
搜索了一下解决方案:打开 Alfred 偏好设置(Preferences)
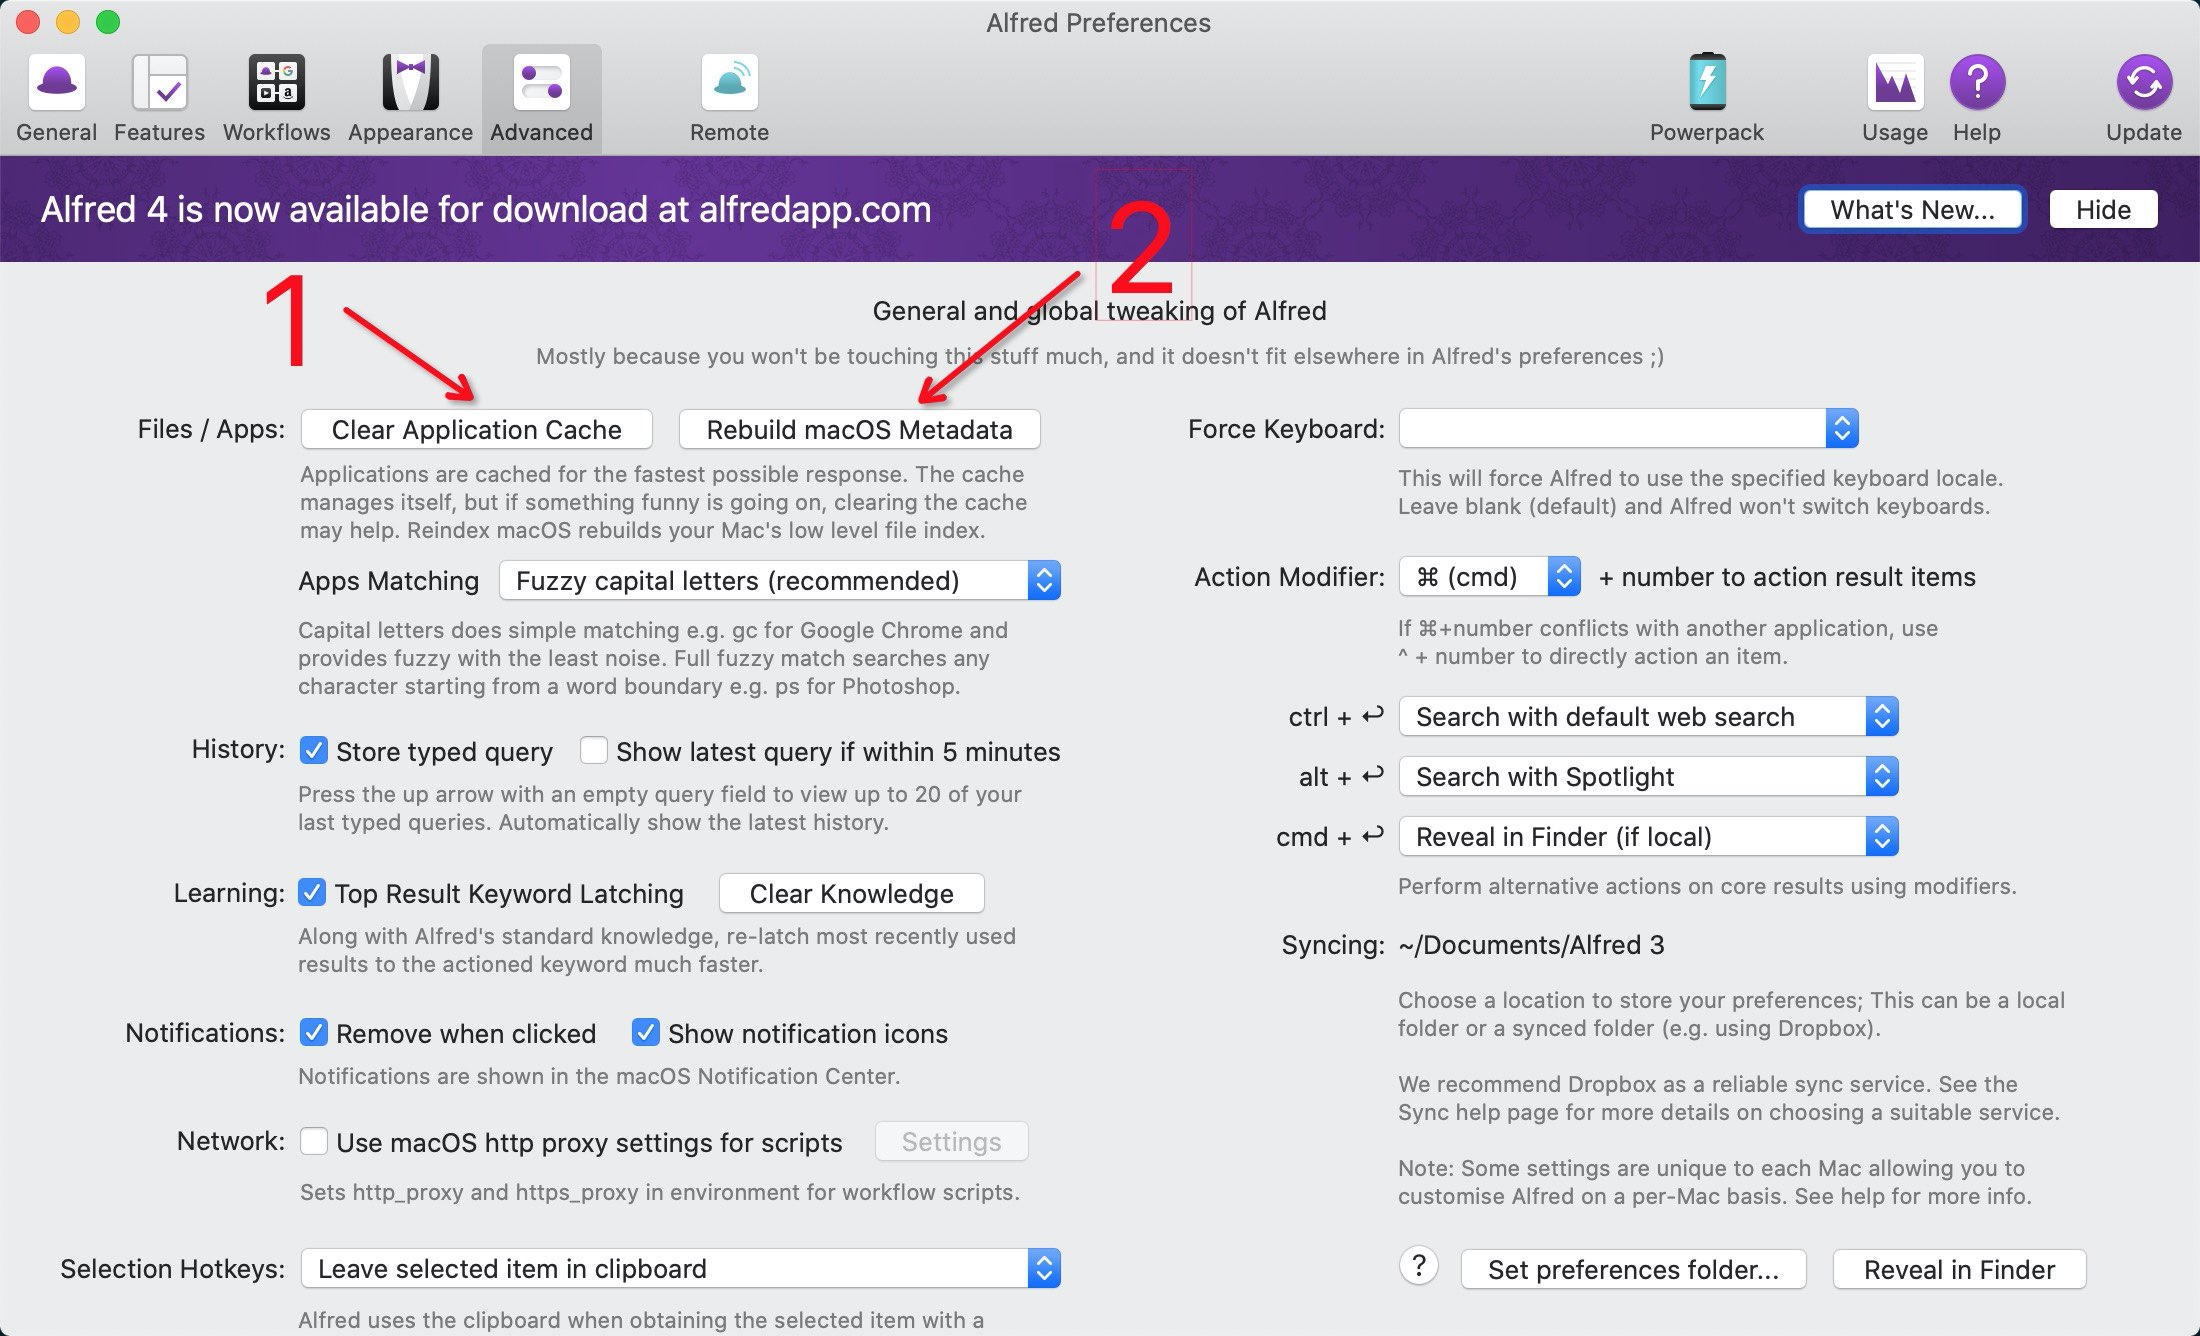
<!– more –>
我把macOS提升到Catalina,现在我不能使用Karabiner-Elements,所以我做了修复它。
参考: https://github.com/tekezo/Karabiner-Elements/issues/1867
打开Mac设置,然后选择 – Security & Privacy > Input Monitoring。
打开终端并打开Karabiner Elements bin文件所在的位置(可以快速复制以下命令)
open /Library/Application\ Support/org.pqrs/Karabiner-Elements/bin
Input Monitoring拖放以下两个文件。
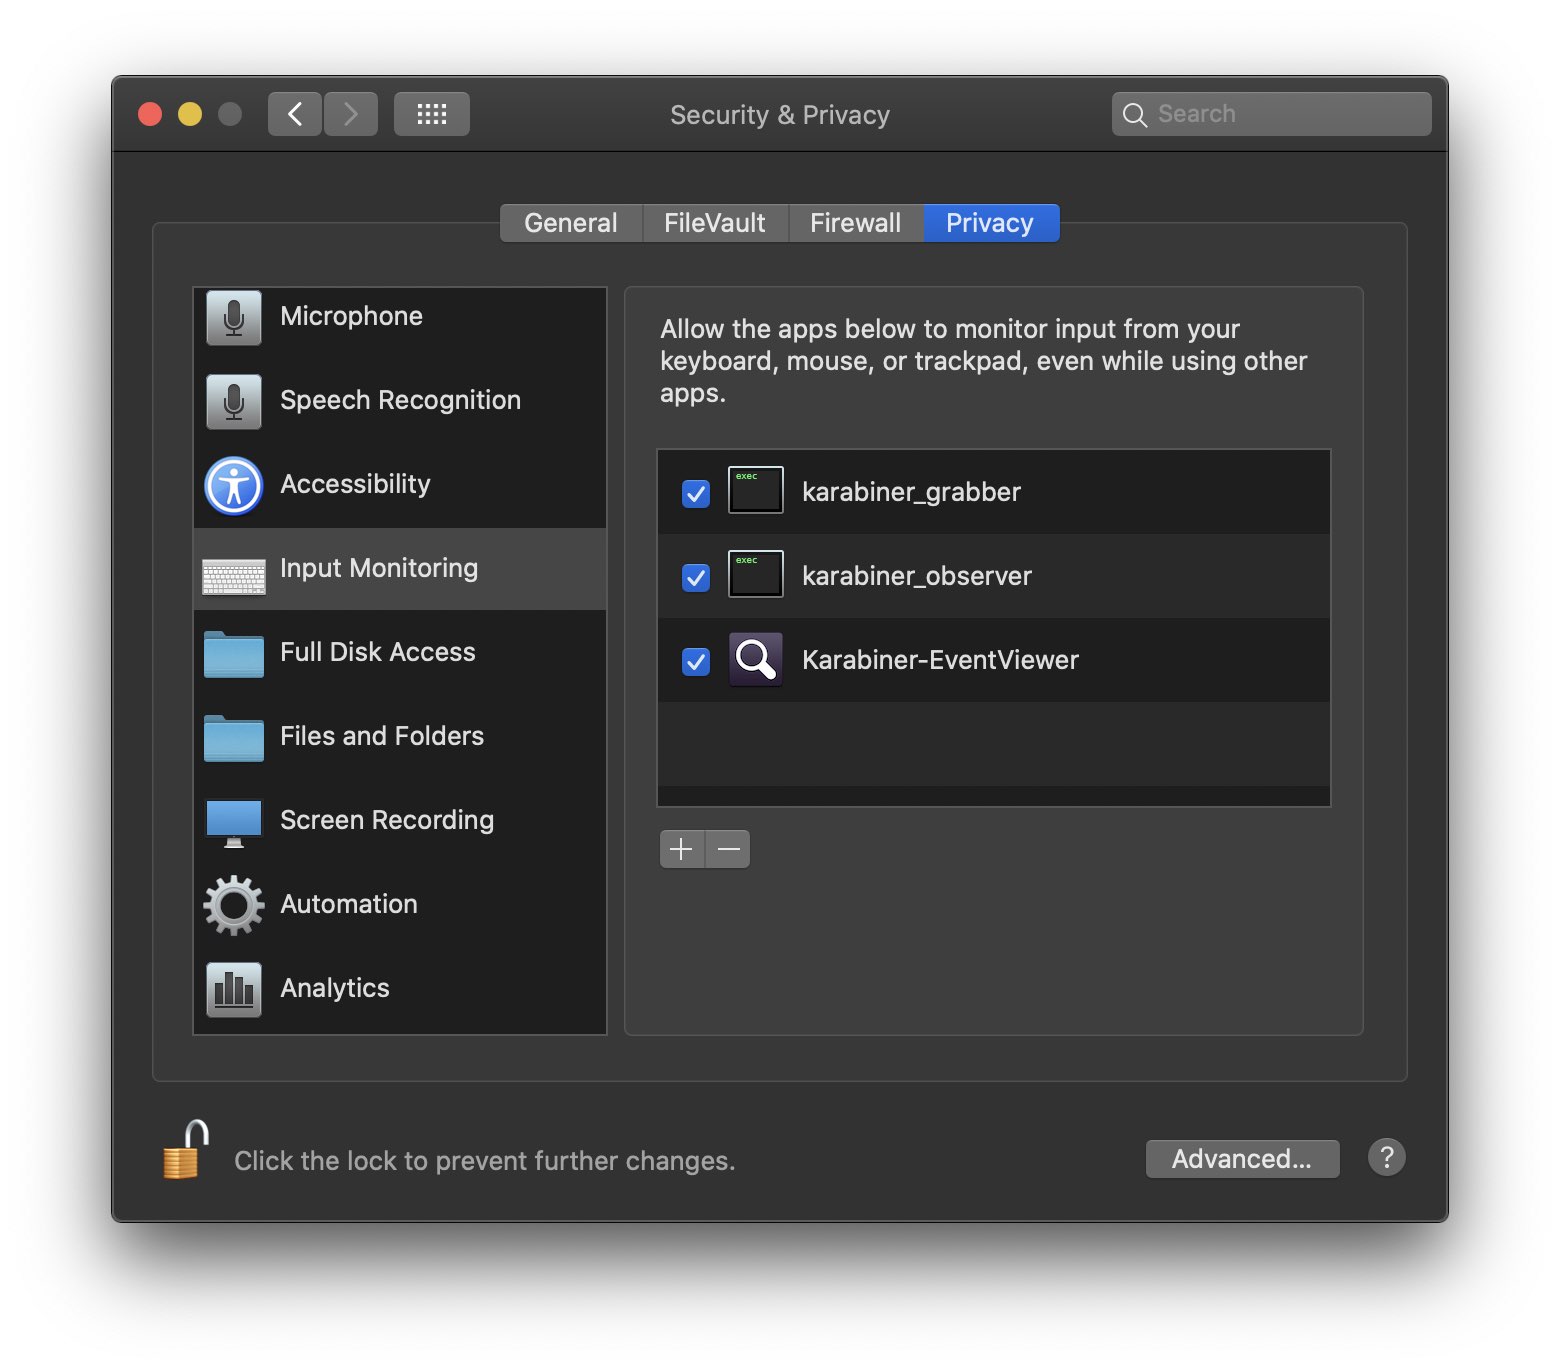
如果
Input Monitoring文件中没有文件,并且无法添加文件,则Karabiner-EventViewer启动Input Monitoring文件时会添加文件,因此将包含其他文件。
sudo killall karabiner_grabber
sudo killall karabiner_observer
这也将使Karabiner-Elements正常工作。
<!– more –>
后端返回时间格式:2019-06-30,前端需要获取这天结束时间;
new Date('2019-06-30 23:59:59') // not working
<!– more –>
这里借助 momentjs 处理了一下
var time = "2019-06-30" + " 23:59:59";

time = moment(time, 'YYYY-MM-DD hh:mm:ss').format('YYYY/MM/DD hh:mm:ss');

new Date(time); // working
iOS new Date(string) 年月日必须以 / 分隔不能以 -
code by @xqin
history | awk '{CMD[$2]++;count++;}END { for (a in CMD)print CMD[a] " " CMD[a]/count*100 "% " a;}' | grep -v "./" | column -c3 -s " " -t | sort -nr | \nl | head -n 10
<!– more –>
安装Go2Shell之后把快捷在当前目录打开终端设置好之后,在终端内输入一下命令:
open -a Go2Shell --args config
执行以下步骤,
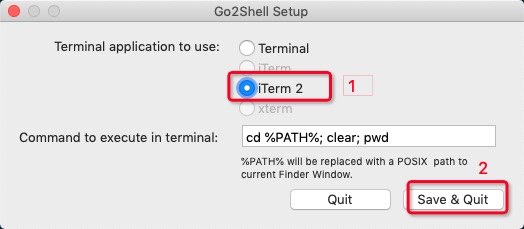
然后再打开 Finder ,点击 Go2Shell 小图标即可在 iTerm2 。
Workerman 是一款开源高性能异步 PHP socket 即时通讯框架。支持高并发,超高稳定性,被广泛的用于手机app、移动通讯,微信小程序,手游服务端、网络游戏、PHP聊天室、硬件通讯、智能家居、车联网、物联网等领域的开发。 支持TCP长连接,支持Websocket、HTTP等协议,支持自定义协议。拥有异步Mysql、异步Redis、异步Http、MQTT物联网客户端、异步消息队列等众多高性能组件。
原文:List of Chromium Command Line Switches
拓展:
macOS 命令行打开Chrome
# case 1
/Applications/Google\ Chrome.app/Contents/macOS/Google\ Chrome

# case 2
/Applications/Google\ Chrome.app/Contents/macOS/Google\ Chrome https://webclown.net

# case 3 app 模式
/Applications/Google\ Chrome.app/Contents/macOS/Google\ Chrome --app=https://webclown.net